This article represents point-to-point instructions on how to install / setup Kubernetes on Mac OS/X. We will look into steps for installing Minikube for working with Kubernetes on Mac OS. The goal is to install stand-alone Kuberenetes for development purpose. The following are the steps:
- Install NodeJS & Docker Runtime for Mac
- Install Homebrew
- Install Xyve Driver (or Hyperkit Driver)
- Install Minikube
- Install Kubectl
- Start Minikube
- Access Kubernetes Dashboard
- Minikube Commands for Kubernetes
Install NodeJS & Docker Runtime for Mac
Make sure you have NodeJS and Docker Runtime installed for MacOS.
Install Homebrew
First and foremost, we need to install the Homebrew, the package manager of MacOS. Use the following command to setup Homebrew:
ruby -e "$(curl -fsSL https://raw.githubusercontent.com/Homebrew/install/master/install)"
Once installation is complete, execute the following command to make sure brew successfully got installed:
brew -v
Install Xyve Driver
Install Xyve Driver using Brew and set its permissions appropriately.
brew install docker-machine-driver-xhyve
sudo chown root:wheel $(brew --prefix)/opt/docker-machine-driver-xhyve/bin/docker-machine-driver-xhyve
sudo chmod u+s $(brew --prefix)/opt/docker-machine-driver-xhyve/bin/docker-machine-driver-xhyve
It should be noted that the xhyve driver is now deprecated and support for it will be removed in a future release. It is recommended to consider switching to the hyperkit driver, which is intended to replace the xhyve driver. The github page on Hyperkit provides instructions on installing Hyperkit using brew command.
Install Minikube
curl -Lo minikube https://storage.googleapis.com/minikube/releases/latest/minikube-darwin-amd64 && \
  chmod +x minikube && \
  sudo mv minikube /usr/local/bin/
Install Kubectl
brew install kubectl
Start Minikube
Finally, its time to get started with Kubernetes. The following are two different commands for starting Minikube when you are behind proxy or otherwise. Execute the following command to check whether you can access sites behind proxy or not:
curl --proxy "" https://cloud.google.com/container-registry/
No Proxy: When you are not behind proxy, execute the following command:
minikube start --vm-driver=xhyve
When behind proxy: Execute following command when you are behind proxy:
minikube start --vm-driver=xhyve --docker-env HTTP_PROXY=http://your-http-proxy-host:your-http-proxy-port --docker-env HTTPS_PROXY=http(s)://your-https-proxy-host:your-https-proxy-port
The following screenshot represents the successful execution of minikube start command.
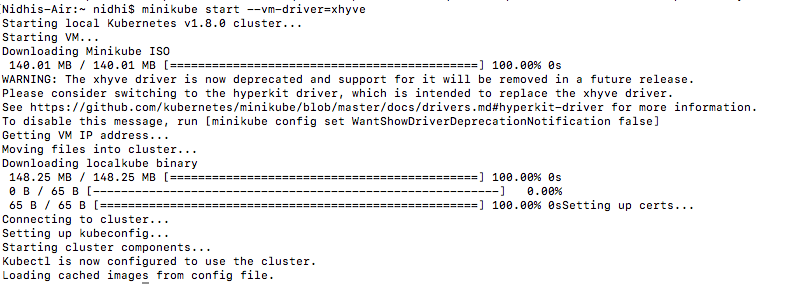
Figure 1. Start Minikube
Access Kubernetes Dashboard
Execute the following command to access Kubernetes dashboard:
minikube dashboard
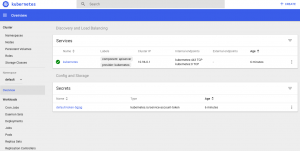
The Kubernetes dashboard will show up in a browser window at following URL: http://192.168.64.2:30000/#!/overview?namespace=default. The following screenshot represents the dashboard view.
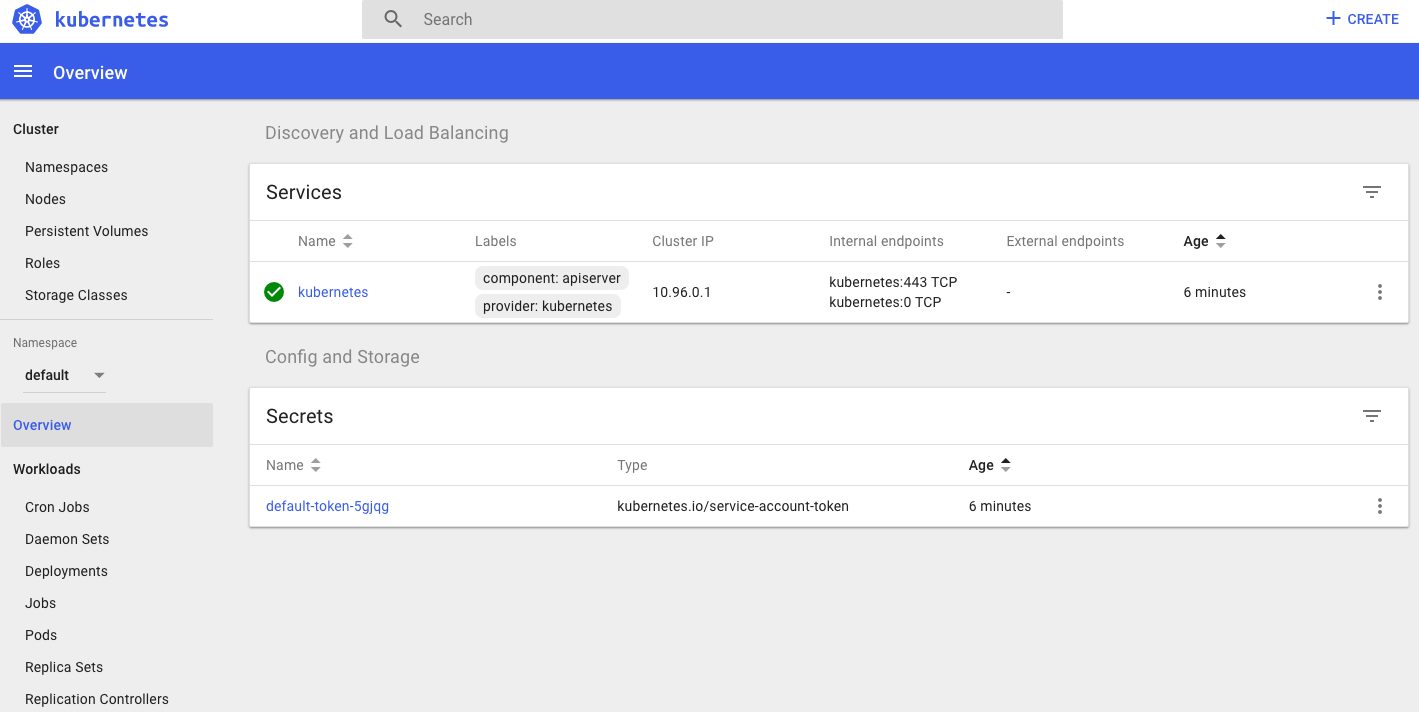
Figure 2. Kubernetes Dashboard
Minikube Commands for Kubernetes
The following are some of the Minikube commands:
Start Minikube
minikube start
Access Minikube Dashboard
minikube dashboard
Stop Minikube
minikube stop

Check out my latest book titled as First Principles Thinking: Building winning products using first principles thinking.
- Mathematics Topics for Machine Learning Beginners - July 6, 2025
- Questions to Ask When Thinking Like a Product Leader - July 3, 2025
- Three Approaches to Creating AI Agents: Code Examples - June 27, 2025
I found it very helpful. However the differences are not too understandable for me