
In this post, you will learn about how to configure Nexus Repository OSS on Windows as a Docker Private Registry. The goal of doing this can be some of the following:
-
Allow developers to push/pull images from local docker image repository installed within the company-wide private network
-
Allow Jenkins jobs to pull images for running automated tasks
One of the key aspects of DevOps automation using Docker containers is setting up private Docker registry which could be accessed by developers. This tutorial would help in setting up Nexus repository as a private Docker registry.
How to Configure Nexus Repository OSS on Windows for Private Docker Registry
The following are the steps to configure Nexus Repository OSS on Windows for Docker Repository:
-
Access the Nexus repository at URL such as http://localhost:8081.
-
Login as admin and password as admin123
-
Go to the Admin page for creating the repository. Click on Create Repository button to create the repository.
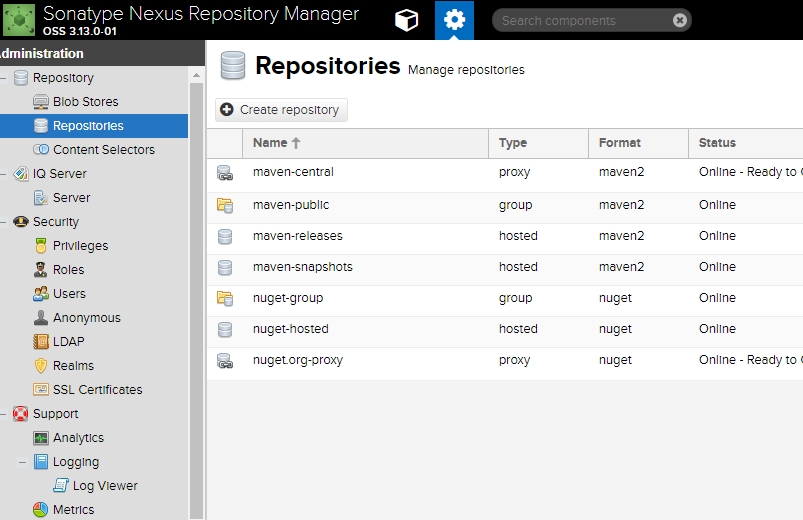
Fig: Access Nexus Repository Page to Create Repository
On the next page, select the Recipe option as docker (hosted). Other related options are docker (proxy) and docker (group). One may choose docker (proxy) option to create a repository which is integrated with a remote repository such as DockerHub or any cloud repository such as AWS ECR. With the repository of type docker (proxy), any image pull will check with the local repository and if the image is not found, it will be downloaded from the remote repository and cached in the local repository for further access.
-
Create the Docker (hosted) repository by providing the following details:
-
Name (unique identifier of the repository); Give the name such as docker-private-rep.
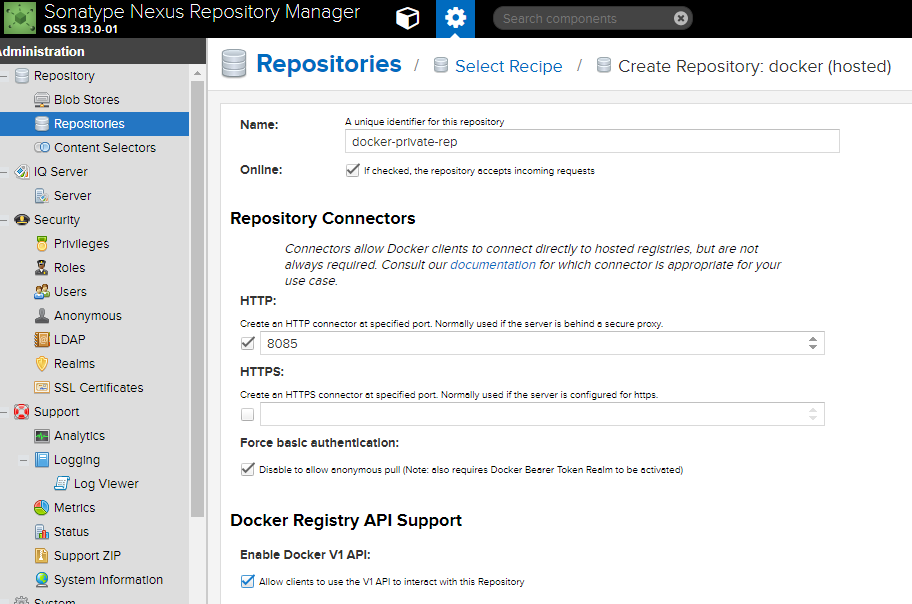
Fig: Create Nexus Repository with Docker Hosted Option
The diagram below represents the extended view of the above screenshot.
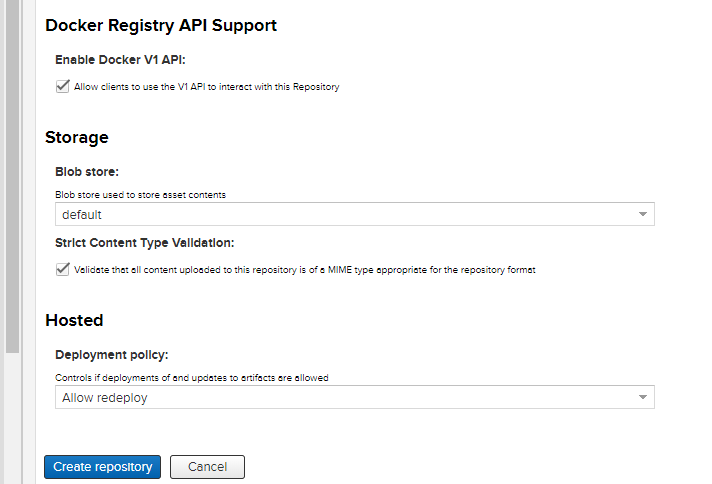
Fig: Create Nexus Repository with Docker Hosted Option – Part 2
-
Repository connectors; Check on Http and provide a port number; In the current example, it is 8085.
-
You could check Force Basic authentication for disabling anonymous pull
-
You may as well check or uncheck Enable Docker V1 API
-
You may leave default blob store selected as it is
-
Click on “Create Repository”
-
-
Check the docker repository by clicking on “Browse” URL on the dashboard.
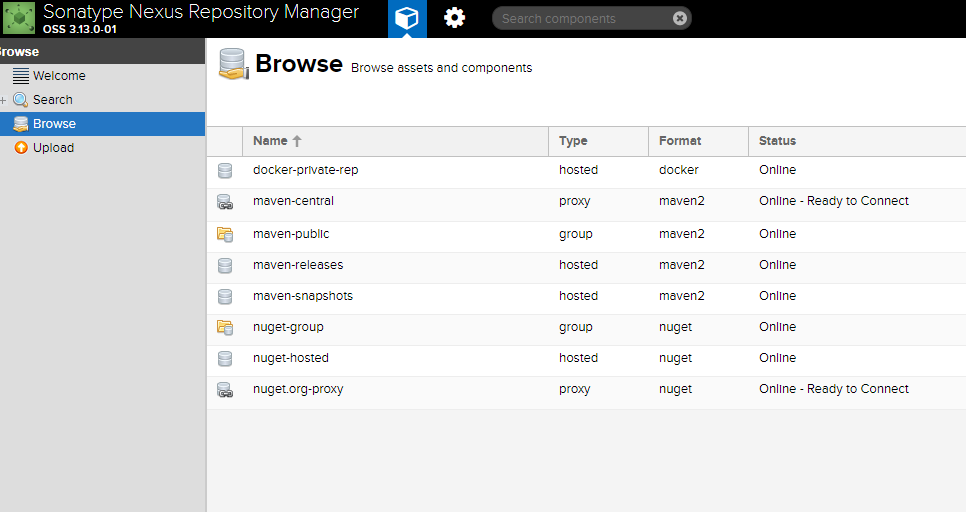
Fig: Browse Docker Repository
-
Configure Docker Client to use Nexus Docker (Hosted) repository. In order to do this, go to Settings of Docker Desktop App. Enter the repository details and click “Apply”. Note that it is IP address of your machine and port number is the one you configured for Http connection while creating the docker (hosted) repository.
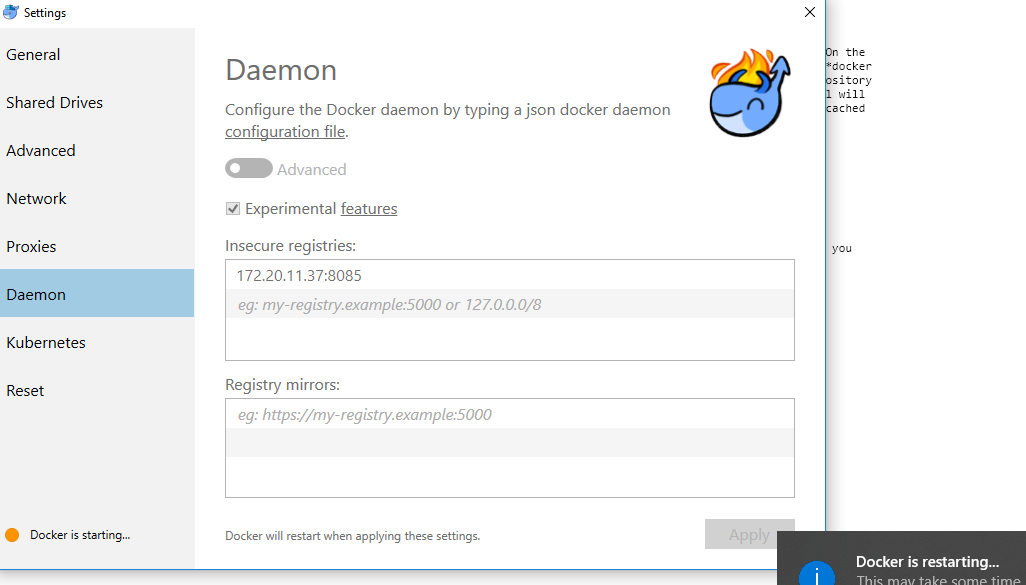
Fig: Configure Docker Client to use Nexus Repository
-
Go to command prompt and access the repository using the following command:
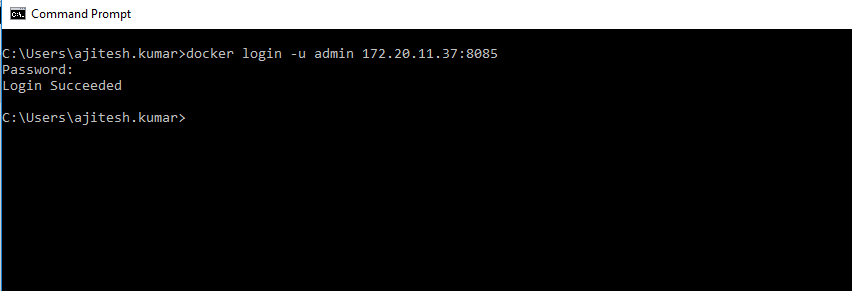
Fig: Access Docker Repository using Docker Client
docker login -u admin repo-ip-address:port -
Test by uploading one of the images
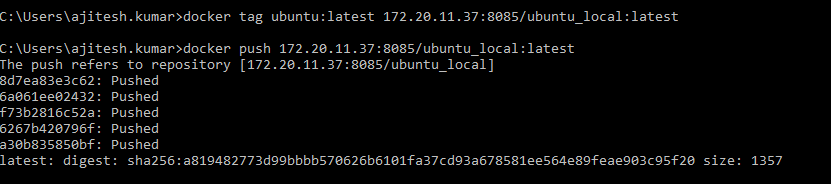
Fig: Docker images uploaded to local Nexus Repository
docker tag ubuntu:latest 172.20.11.37:8085/ubuntu_local:latest docker push 172.20.11.37:8085/ubuntu_local:latest -
Check whether the image got uploaded by accessing Nexus Docker Repository UI.
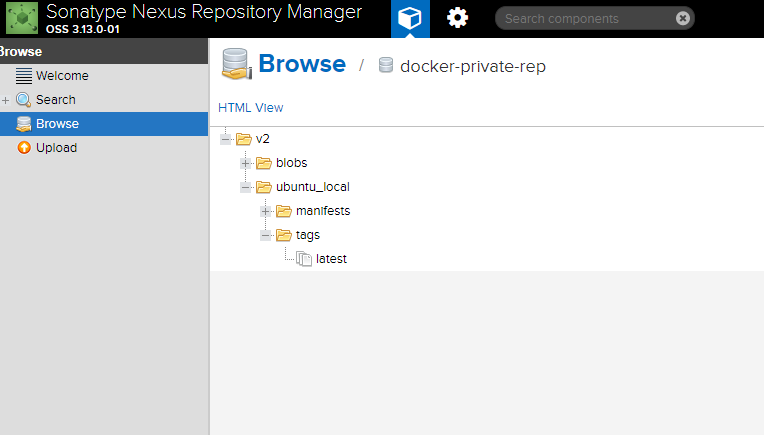
Fig: Browse Docker Images in local Nexus Repository
References
Summary
In this post, you learned about how to configure Nexus Repository OSS for setting up Docker registry on Windows. This could be extended to set up the Nexus Repository for Docker Registry on a local server which could be accessed by developers to push and pull the docker images. This could also be used by Jenkins jobs to run the automated tasks. One of the interesting manners in which it could be used is to create containerized machine learning tasks such as training/testing the models. These containerized tasks could be run on-demand or using Jenkins jobs.

Check out my latest book titled as First Principles Thinking: Building winning products using first principles thinking.
- Mathematics Topics for Machine Learning Beginners - July 6, 2025
- Questions to Ask When Thinking Like a Product Leader - July 3, 2025
- Three Approaches to Creating AI Agents: Code Examples - June 27, 2025
Hello Ajitesh,
Configure Nexus Repository for Docker Registry (Windows)
To perform this, we have to connect the newly created docker(hosted) repo with the docker client via docker desktop app according to your article.
is there any way that we can connect the docker client with the newly created Nexus repo without using the docket desktop app.
Kindly suggest a way and your response is highly anticipated and appreciated.
Thanks a ton in advacnce.