This article represents a quick, crisp and to-the-point instructions on how to setup Kubernetes on Ubuntu VM. The steps below would help you get started with Kubernetes on your laptop with the help of Minikube. Minikube is a tool which runs a single-node kubernetes cluster inside a VM (virtualbox in this article) on your laptop. In this article, we will look at the steps for installing Kubernetes within an Ubuntu VM. The steps remain almost same for Ubuntu OS with the difference of how you enable the virtualization at BIOS level.
- Install VirtualBox (as part of installing a hypervisor)
- Enable Virtualization
- Install Kubectl
- Install Minikube
- Start/stop Kubernetes
Install VirtualBox
First and foremost, a hypervisor needs to be installed. We will install Virtualbox. The detailed instructions can be found on VirtualBox installation page. For Linux distributions, the instructions can be found on this page, VirtualBox for Linux.
- Open the sources.list file
sudo vi /etc/apt/sources.list
- Place the following command in the sources.list file:
deb http://download.virtualbox.org/virtualbox/debian xenial contrib
In place of “xenial” (Ubuntu 16.04), use following for other versions of Linux/Ubuntu:
- zesty: Ubuntu 17.04
- yakkety: Ubtuntu 16.10
- Vivid: Ubuntu 15.04
- Trusty: Ubuntu 14.04
- Utopic: Ubuntu 14.10
- Execute the following commands to install Virtualbox:
sudo apt-get update
sudo apt-get install virtualbox-5.2
Enable Virtualization
Click on processors and check the box such Virtualize Intel VT-x… as shown in the diagram below.
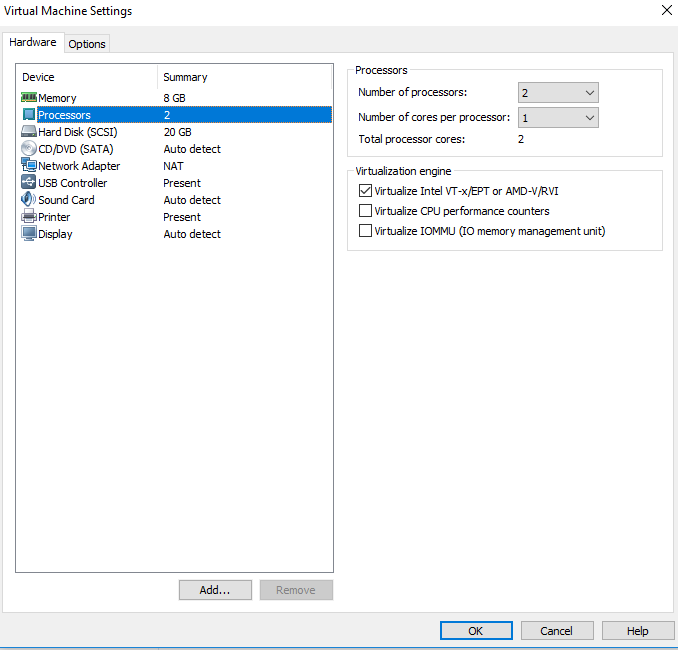
Figure 1. Enable Virtualization on Ubuntu VM
Install Kubectl
- Download the Kubectl
# The command below installs Kubectl version 1.9.0
curl -LO https://storage.googleapis.com/kubernetes-release/release/v1.9.0/bin/linux/amd64/kubectl
# For stable version, use following command:
curl -LO https://storage.googleapis.com/kubernetes-release/release/$(curl -s https://storage.googleapis.com/kubernetes-release/release/stable.txt)/bin/linux/amd64/kubectl
- Once done with one of the above command, execute following command to move kubectl to /usr/local/bin
chmod +x ./kubectl
sudo mv ./kubectl /usr/local/bin/kubectl
Install Minikube
curl -Lo minikube https://storage.googleapis.com/minikube/releases/v0.24.1/minikube-linux-amd64 && chmod +x minikube && sudo mv minikube /usr/local/bin/
minikube version
Start/Stop Kubernetes
- Start Minikube
minikube start
The following diagram represents the same:
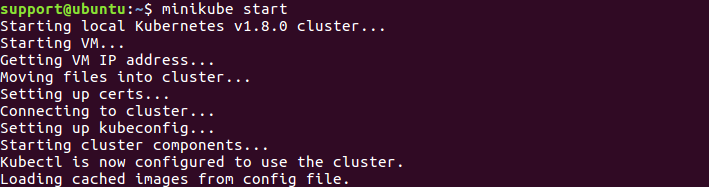
Figure 2. Minikube Start
- Access the Kubernetes Dashboard; The command below would open up a browser.
minikube dashboard
The following page shows up in the browser:
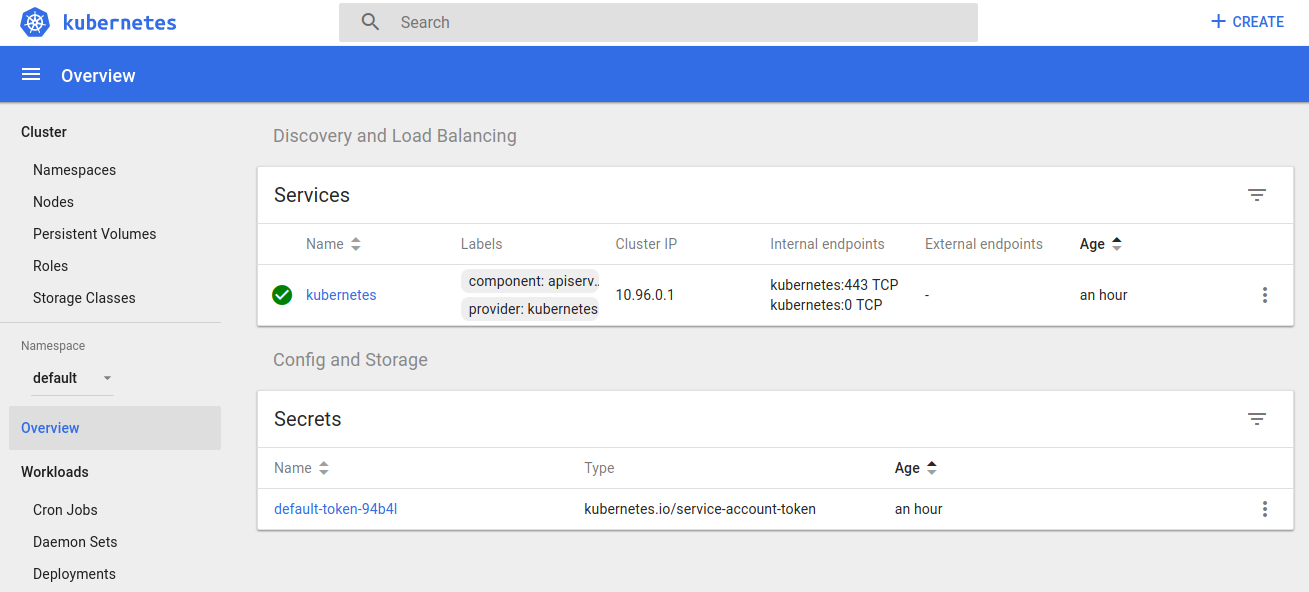
Figure 3. Kubernetes Dashboard
- Stop the Kubernetes
minikube stop

Check out my latest book titled as First Principles Thinking: Building winning products using first principles thinking.
- Mathematics Topics for Machine Learning Beginners - July 6, 2025
- Questions to Ask When Thinking Like a Product Leader - July 3, 2025
- Three Approaches to Creating AI Agents: Code Examples - June 27, 2025
I found it very helpful. However the differences are not too understandable for me