The article represents concepts around OAuth based authentication with help of Google OAuth 2.0 Playground, Thanks to Google! Google OAuth 2.0 playground could be accessed at https://developers.google.com/oauthplayground/ . It may be recommended to check the article on OAuth Authentication in order to understand the OAuth with the help of OAuth playground in a much better fashion.
Google OAuth 2.0 Playground is a Google application put out there on the web for users to achieve some of the following objectives:
- Work with various different Google APIs and study/understand API feed data in form of request/response (JSON response).
- Understand OAuth based authentication and underlying technology consisting of concepts such as authorization code, authorization, request/refresh tokens etc.
In OAuth terminologies, Google OAuth playground acts as a client/consumer application that would access the users (resource owner) resources on Google servers (service provider) using one of the listed APIs on the page, https://developers.google.com/oauthplayground/. Simply speaking, if you try to play with one of the APIs, following is how it looks like from the perspective of different stakeholders involved in the overall authentication process:
Resource Owner: YOU
Client/Consumer Application: Google OAuth 2.0 Playground
Server/Service Provider: Google
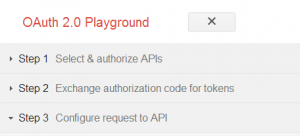
As you start playing with different APIs on the playground, you would observe following 3 steps which is illustrated with further details:
Step 1: Select and Authorize APIs
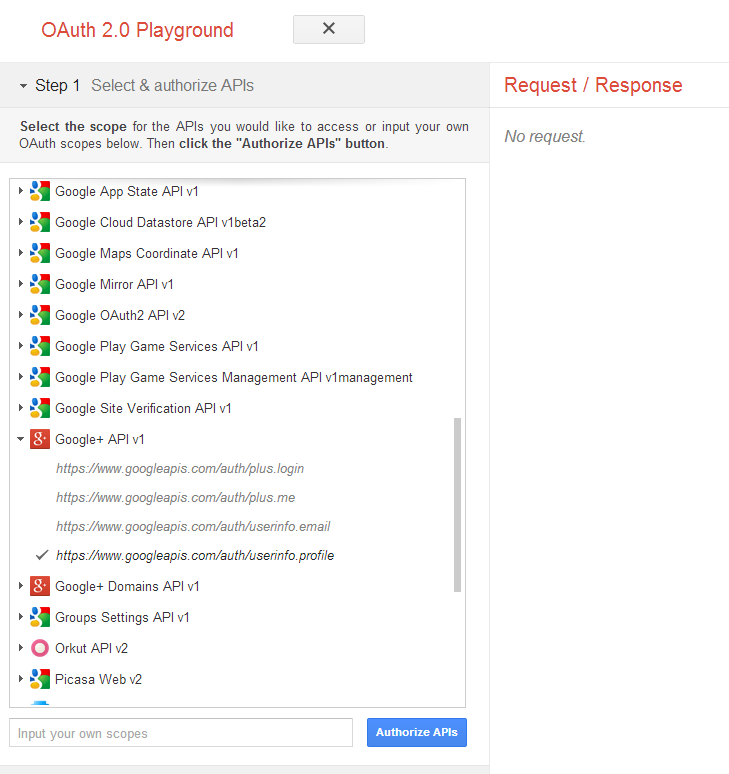
For illustration purpose, lets choose Google Plus API such as https://www.googleapis.com/auth/userinfo.profile . Click and expand Google+ API and click on the link such as that related with userinfo.profile. Before starting working on the playground, you must LOGIN with your google account credentials. Once clicked on the API, “Authroize APIs” button would become active. Click “Authorize APIs” button. Look at the diagram below.
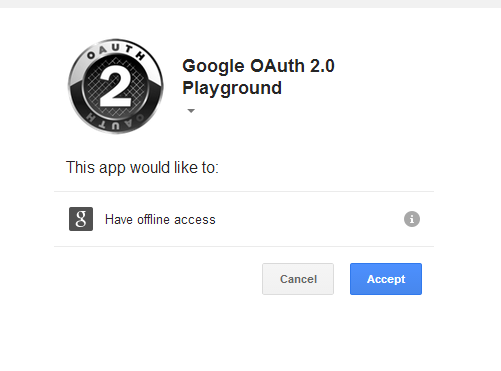
Once clicked on Authorize API, Google+ application will inform that Google OAuth 2.0 playground application is trying to access your resource and whether you wanted to authorize it. Look at the diagram below:
Step 2: Exchange authorization code for request/refresh tokens
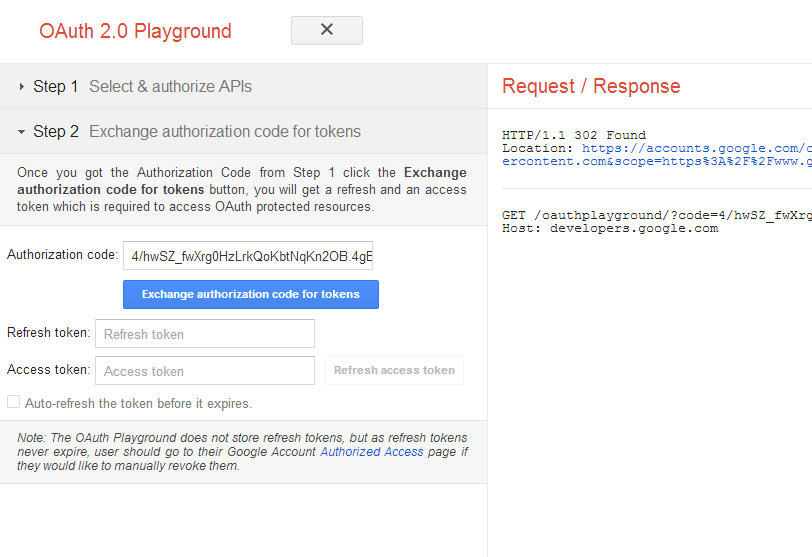
Once you clicked “Accept”, the authorization code is then sent back to client/consumer application which is then used by client/consumer application to send back to the service provider and get request/refresh tokens.
In this step in playground, you are, instead, displayed the authorization code and asked to get tokens by clicking on “Exchange Authorization Code for Tokens”. Once you click on this button, what you would get are two tokens, one called as access token and other called as refresh token. Take a look at the diagram below. Remember that access token is used to then access the protected resource and refresh token is used to get access token once it expired.
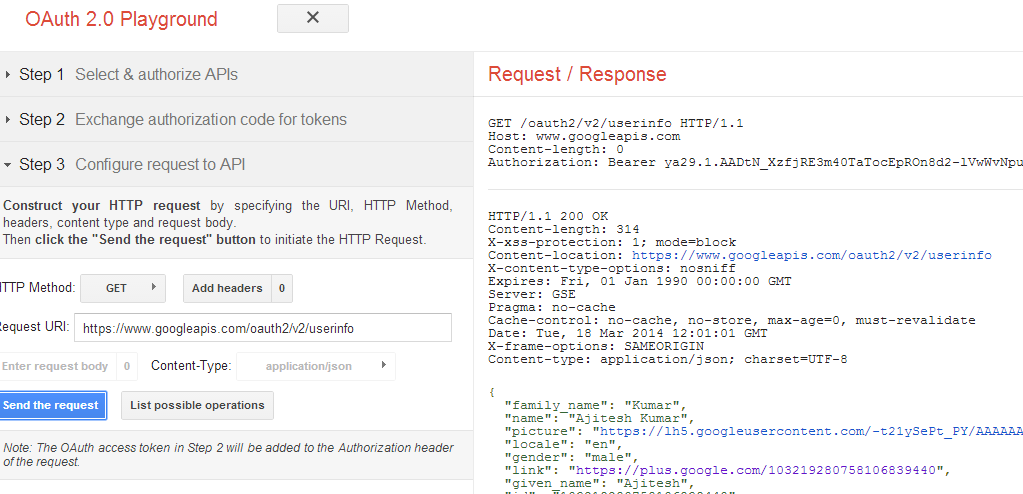
Step 3: Configure & Send requests to API
Once the client application (oauth playground) gets, both the access and refresh tokens, it is all set to access the protected resources of the user. Click on the “List Possible Operations” and you would be shown as a popup with different APIs. Click on one of them such as GetUserInfo and and click “Send the Request” button. And, the client application, OAuth Playground, would access and display the user profile information in JSON format like below:
- Three Approaches to Creating AI Agents: Code Examples - June 27, 2025
- What is Embodied AI? Explained with Examples - May 11, 2025
- Retrieval Augmented Generation (RAG) & LLM: Examples - February 15, 2025
I found it very helpful. However the differences are not too understandable for me