
This article represents tutorial in relation to how to get started with creating your first Java / PHP Hello World program using AWS Cloud9 IDE.
Supported Runtimes in AWS Cloud9
Before getting started with creating runtime environment and execute hello world programs in Java and PHP and other languages, lets look at what all runtimes are supported. Following screenshot represents the supported runtime:
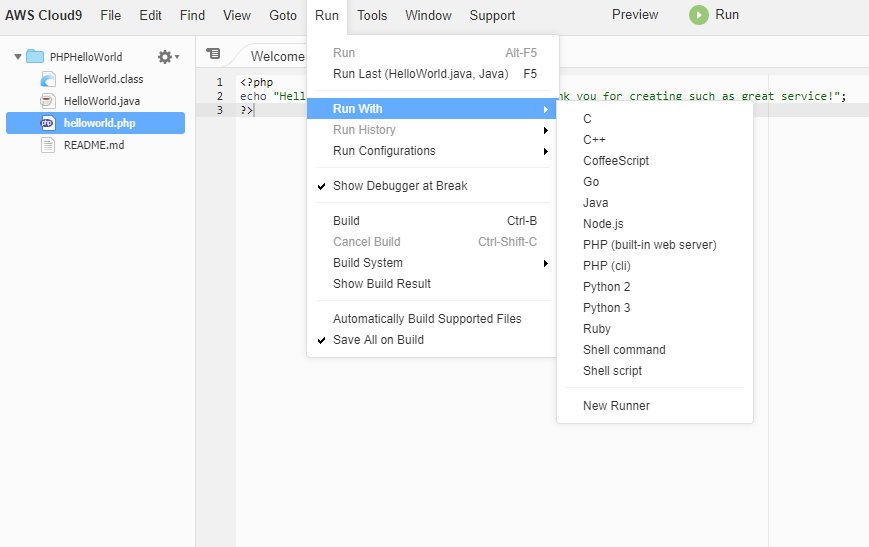
The above represents the fact that one could create programs / application using one of the following programming languages:
- C
- C++
- Java
- Go
- Node.js
- PHP
- Python
- Ruby
In this article, I have shown how to create hello world program using Java and PHP programming language. The following steps represent way to create your hello world programs. The following are some of the steps illustrated in this article:
- Create your AWS account
- Access Cloud9 Service
- Create Cloud9 environment
- Configure / review environment
- Create / Run PHP hello world program
- Create / Run Java hello world program
- Collaborate with other developers
- Delete the Cloud9 environment
Create your AWS Account
Create an AWS account. You can get started by accessing AWS Console Page from where you can either open an account or sign in.
Access Cloud9 Service
Go to Cloud9 IDE Service; From the AWS Services home page after you logged in, click on Cloud9 which can be found under Developer Tools. Alternatively, click on cloud9 home page.
Create Cloud9 Environment
From Cloud9 homepage, click on the button “Get started with AWS Cloud9”. You would land on following page:

Click on Create environment. You would land on the following page:
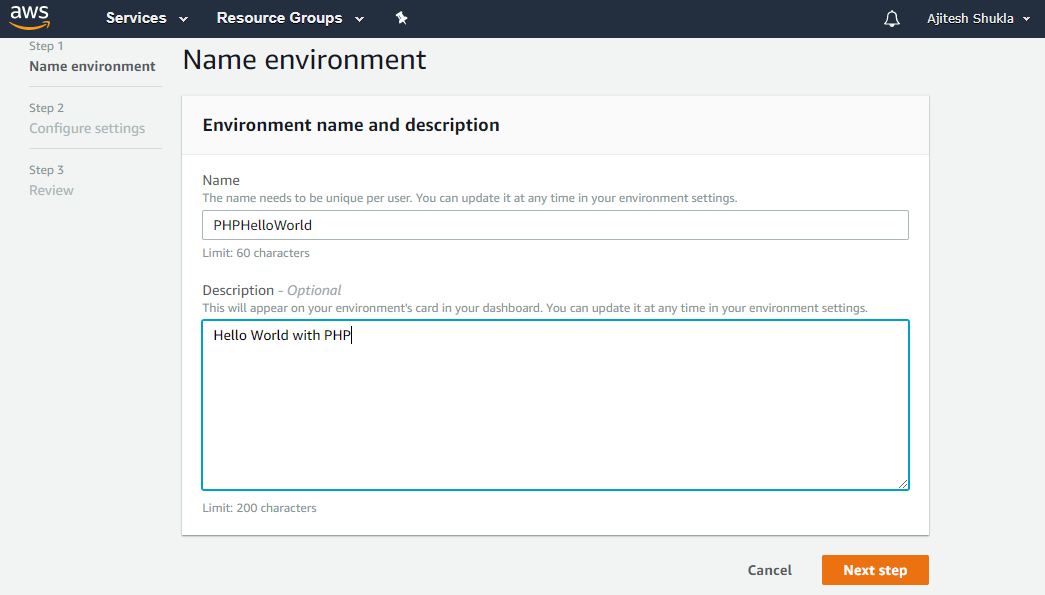
Configure / Review Cloud9 Environment
After you have entered environment details, next step is to configure the environment. As part of configuring the environment, you would be choosing an instance type which would be used to run your runtime environment. The following screenshot represents the same:
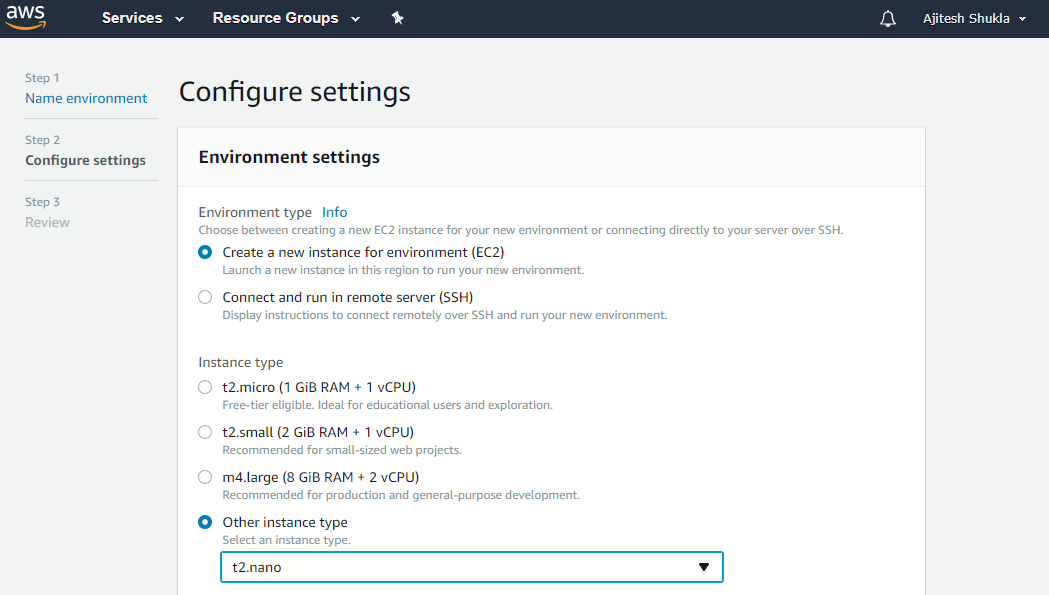
Once done with configuration, next step is to review. The following represents the same.
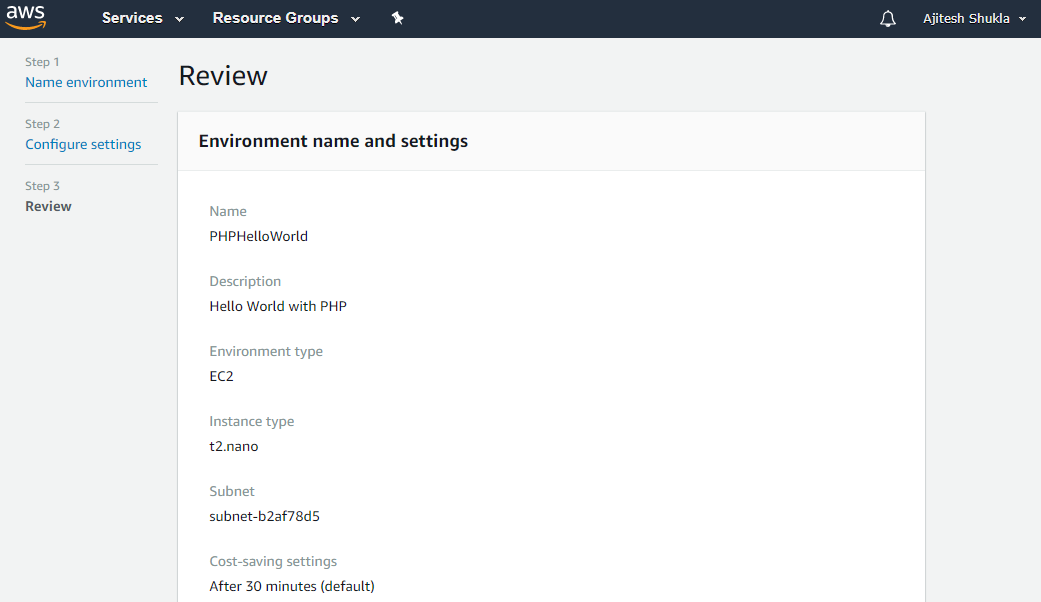
Cloud9 IDE First Look – That is Cool!
As a result of above, you end up creating your Cloud9 IDE. This is how it looks like:
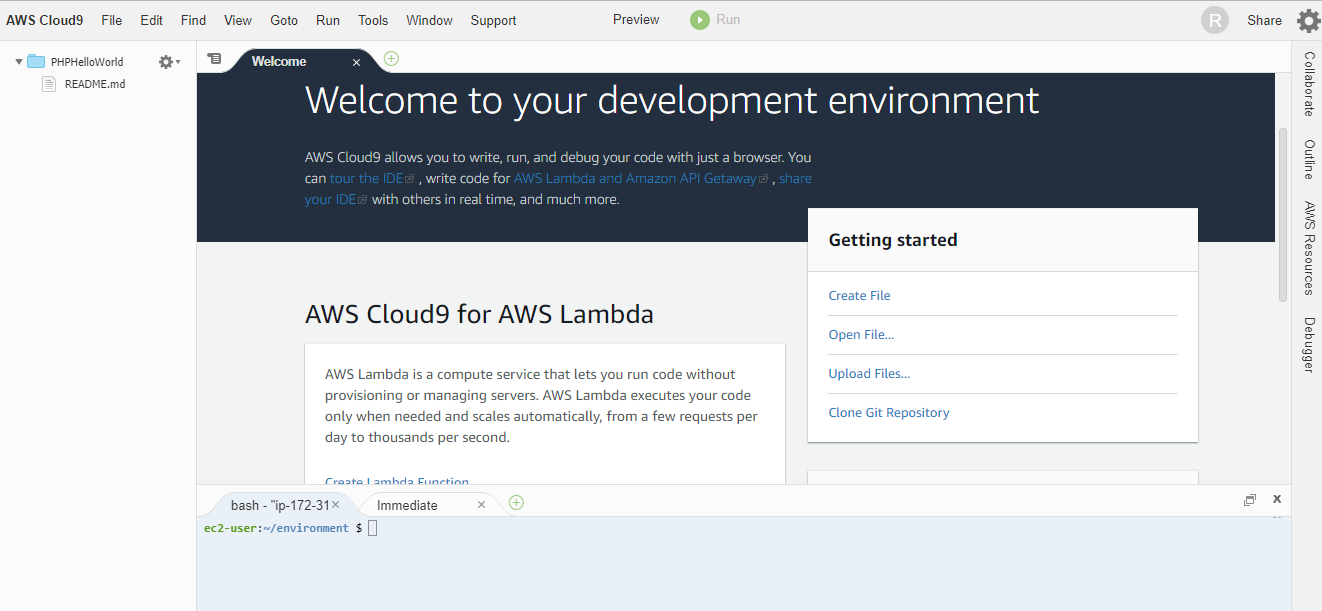
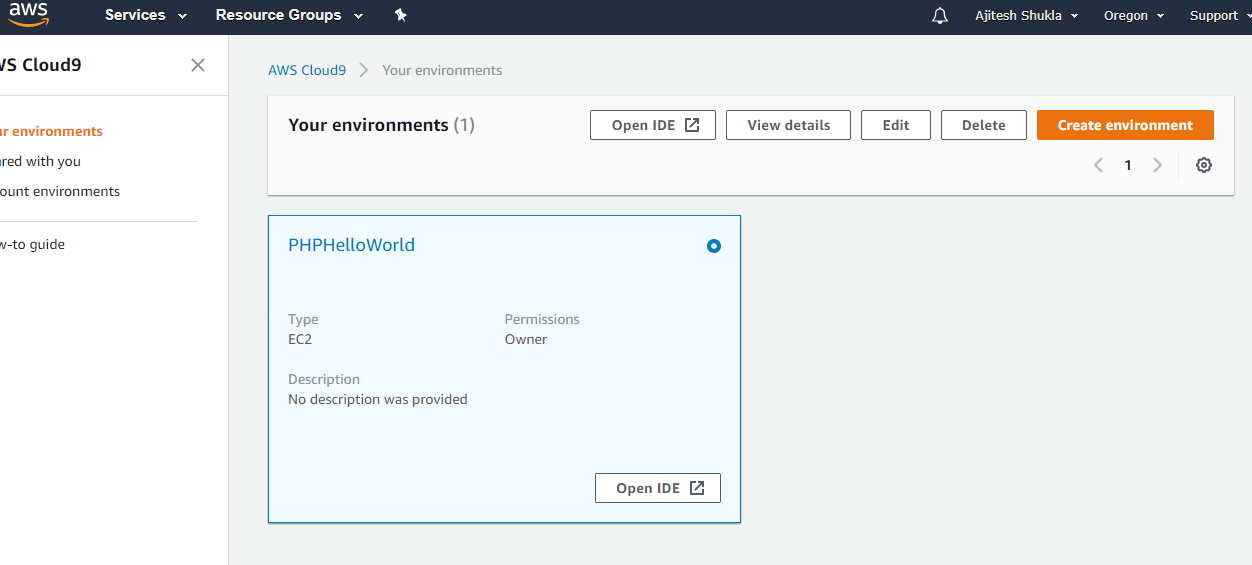
You can also access the dashboard by clicking Cloud9 under Developer Tools from AWS Services dashboard. This is how it looks like:
Create / Run PHP Program
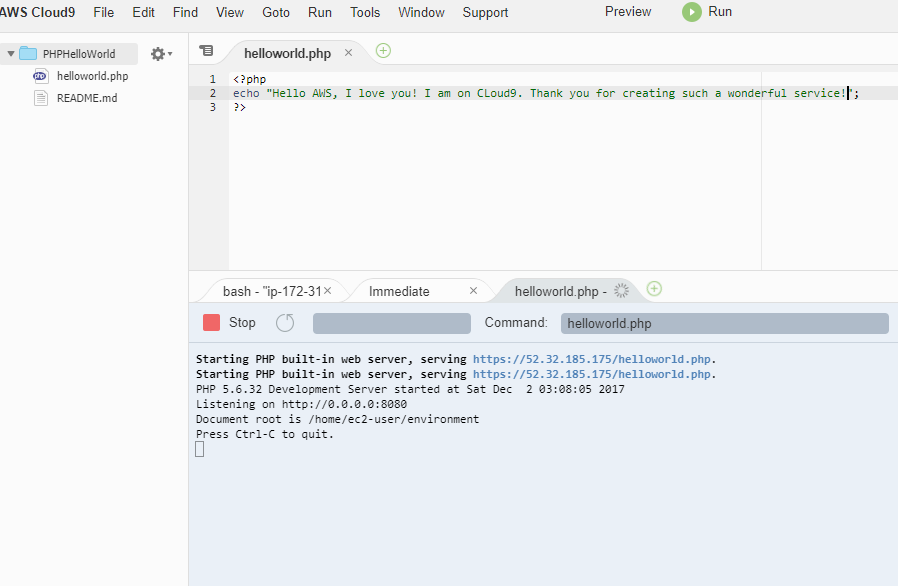
Now it is time to create your first PHP Hello Program. Click on File / New or Alt N or + green circular button. The picture below represents the same.

Once file is created, click on Run button to run the Hello world program using PHP runtime. It would show up the following:
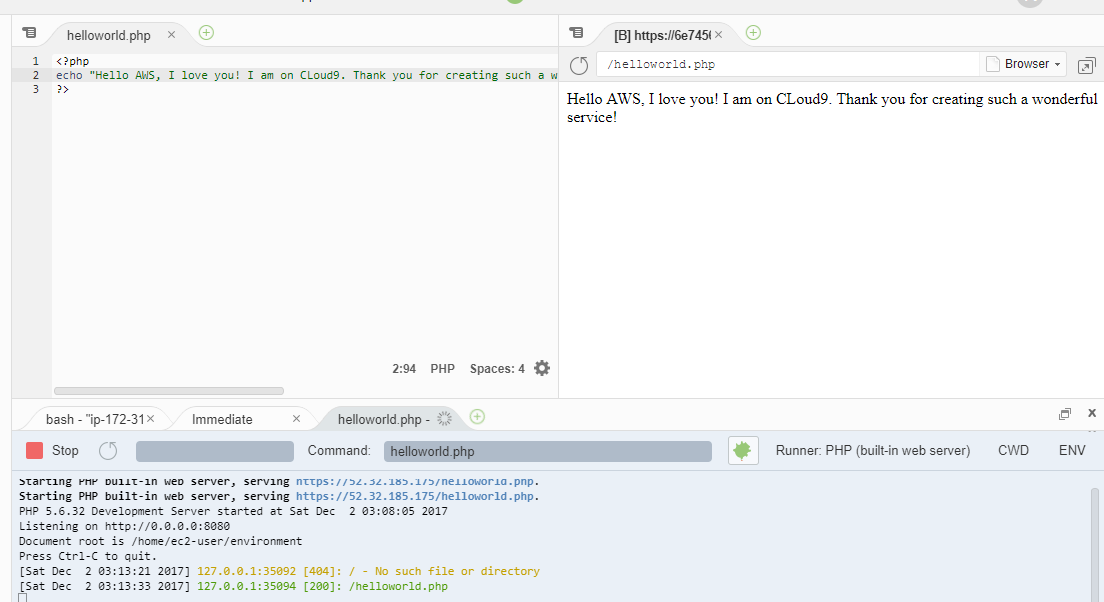
Next step is to see the output in a browser. Click on Preview button. This is how it would show up:
Create / Run JAVA Program
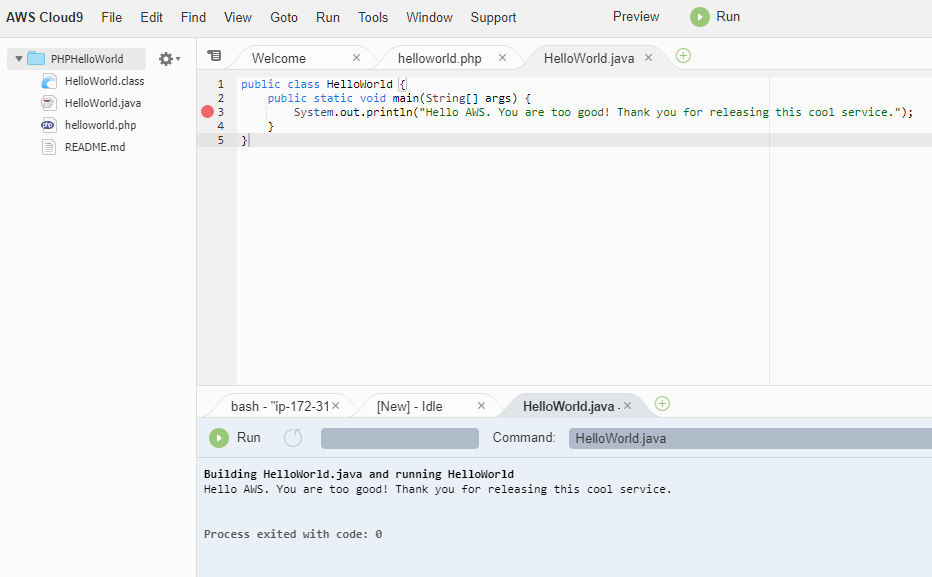
In the similar manner as above, Create a Java HelloWorld program by on File / New or Alt N or + green circular button and creating a new file such as below. Once done, click on Run button and you would end up printing Hello world message.
Collaborate with Other Developers
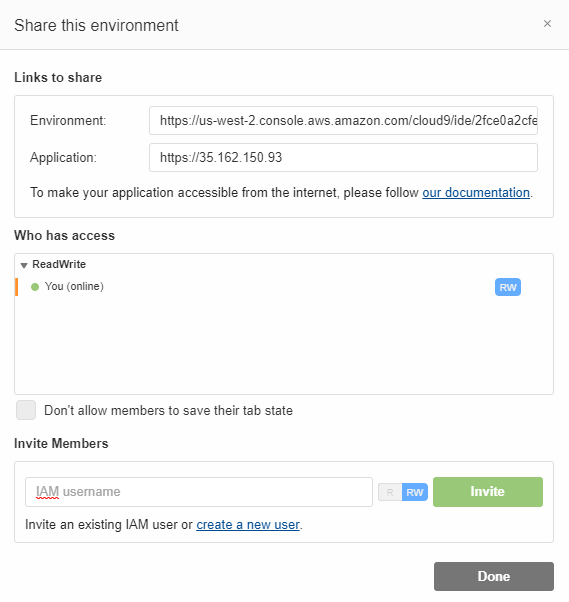
You can also collaborate with other developers. Following screenshot represents the same:
Delete the Environment
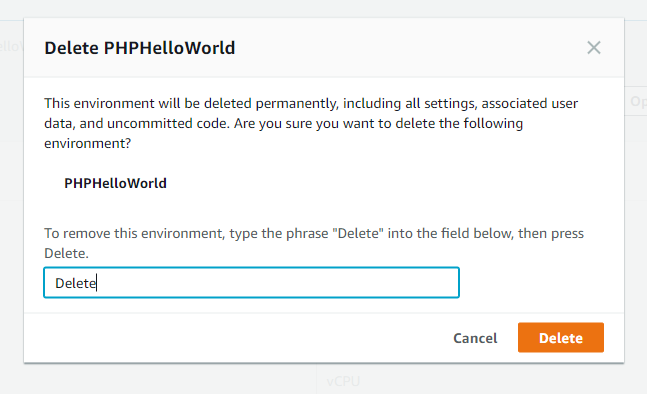
If you are done with your POC or programming, go ahead and delete the environment from Cloud9 Dashboard. Following screenshot represents the same. Click on Delete button and following dialog box would appear. Write “Delete” in textfield and submit. Your environment would be deleted.
As a summary, we looked at different steps required to getting started with hello world programs using Java and PHP with AWS Cloud9 IDE. Please feel free to suggest / share your thoughts.
- The Watermelon Effect: When Green Metrics Lie - January 25, 2026
- Coefficient of Variation in Regression Modelling: Example - November 9, 2025
- Chunking Strategies for RAG with Examples - November 2, 2025

I found it very helpful. However the differences are not too understandable for me