Pre-requisites
Following are pre-requisites to get started quickly:
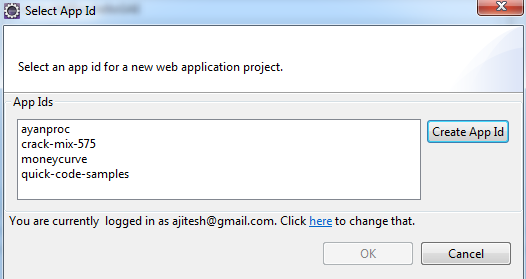
- Create a Google account. This would be used to create an App Engine Id that would represent your web application on the web. For an app engine id, xyz, the web URL of your application will be xyz.appspot.com. You could alternatively create App Engine Id right from within Eclipse shown below.
- Install Java (I did proof-of-concept with JDK1.7.0_40)
- Install Eclipse Java EE(I did with Eclipse Kepler)
- It would be good if you are familiar with working on java web application projects with Eclipse IDE. Get yourself familiar by playing around with a couple of Eclipse Dynamic Web Project.
- Optional: Get hold of Bootstrap UI framework to be able to put some nice, quick UI.
- Download Eclipse plugin (Eclipse Kepler) for Google App Engine.
Once done with above, you are all set. Follow the steps given below and you shall have your decent looking hello world web application in no time.
Create a Google Web Application project
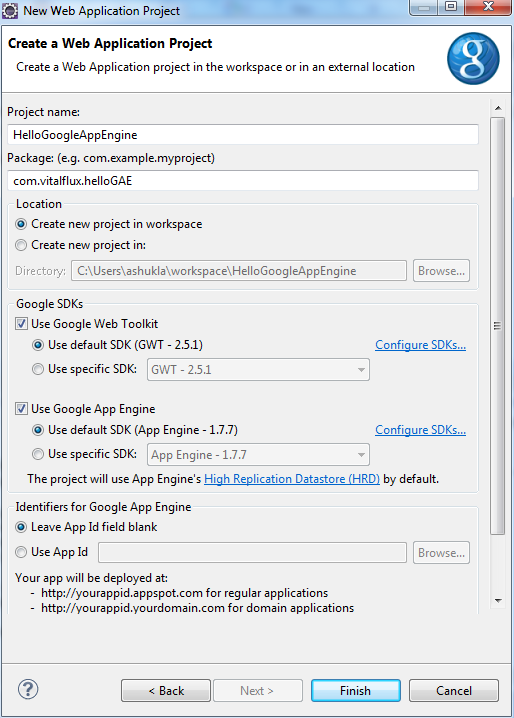
Create a Google Web Application project as shown in the pictures below. Take a note of the diagram representing the creation of App Id. You could go to Web and create an App Id or create Id from within Eclipse. However, the ID is MUST for you to be able to deploy your application from within Eclipse without any hassles.
Run the Web Application
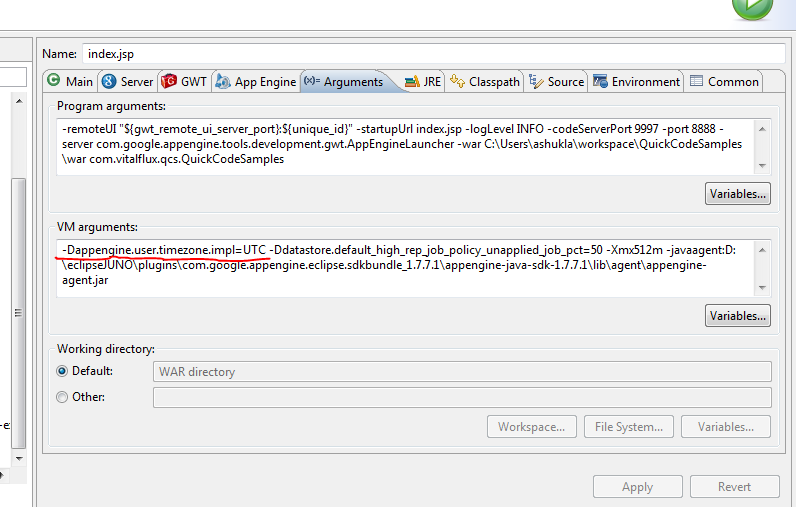
Right click on project and click on “Run As” -> “Web Application”. Chances are you will get error related to timezone and embedded server (Jetty) won’t start. The way to fix the error is following:
– Right click on project and click on “Run As” -> “Run Configurations”. Add “-Dappengine.user.timezone.impl=UTC” as shown in the diagram below. Start the server and you should be able to start.
Access the application at http://127.0.0.1:8888/<somefilename>.html
Add JSP Files & Bootstrap
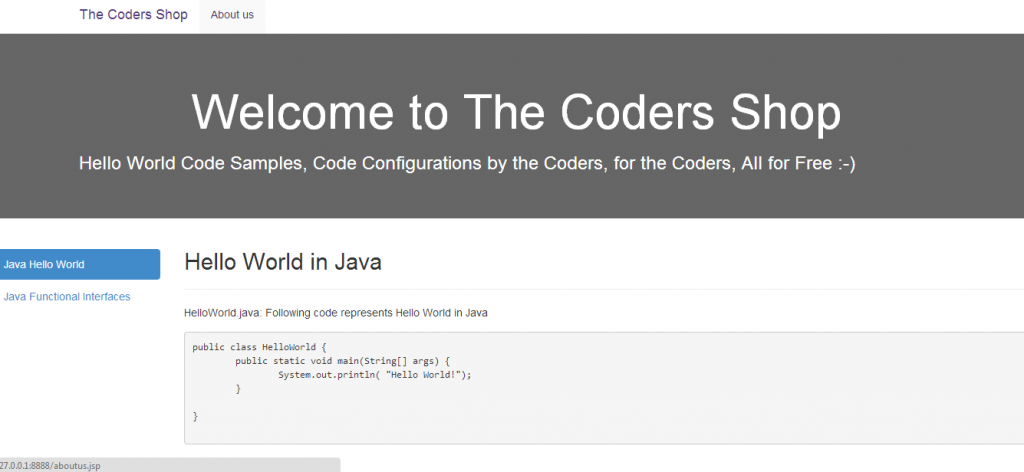
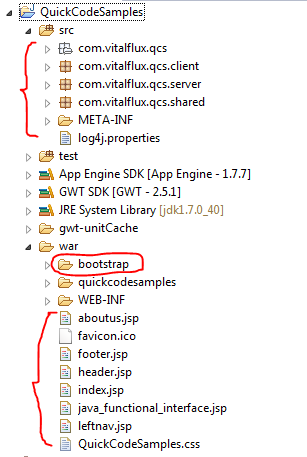
It is time to add bells and whistles. Once created, create few JSP files under WAR folder. Also, place bootstrap folder within WAR folder as shown in below picture. For you to be able to set the default file as index.jsp, change the configuration in WEB-INF/web.xml.
Run the Web Application
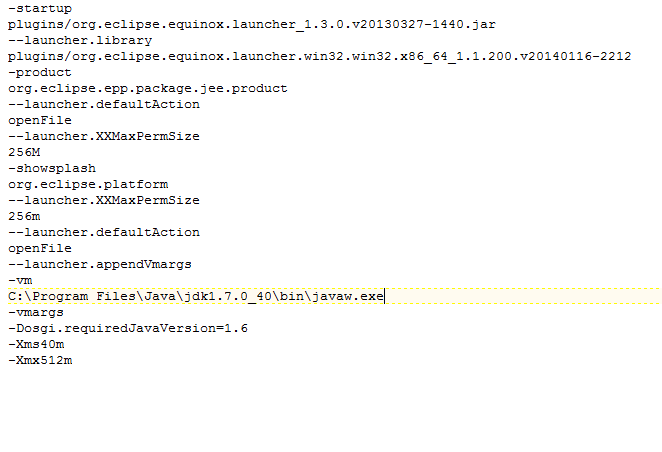
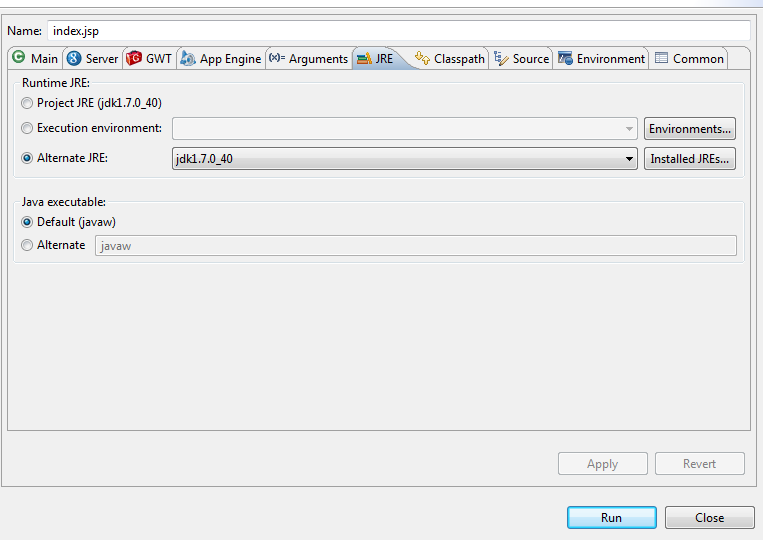
Start the server. Chances will be that server will fail to start. It will give errors related compiling with JSP saying use JDK rather than JRE. To fix this error, you need to set JDK configuration same as in GAE and eclipse. Thus, you need to do following two things.
– Fix Eclipse Configuration (eclipse.ini) by defining “-vm” path. This is a path to javaw.exe in JDK installation. See the diagram below.
– Fix GAE JDK configuration. Right click on project and click on “Run As” -> “Run Configurations”. Go to JRE tab and set the JDK path for JDK installation and not JRE.
Deploy to Google App Engine
Deploy your web application on App Engine by doing right-click on your project and clicking on “Google” – “Deploy to App Engine”.
If you face any issues with above steps, let me know and I shall help you to get it resolved.
- The Watermelon Effect: When Green Metrics Lie - January 25, 2026
- Coefficient of Variation in Regression Modelling: Example - November 9, 2025
- Chunking Strategies for RAG with Examples - November 2, 2025
I found it very helpful. However the differences are not too understandable for me