This blog represents steps/instructions on how to setup Kubernetes on Ubuntu (Linux) using Minikube. The instructions have been used to setup Kubernetes on Ubuntu 16.04. Following are key steps which need to be taken in order to setup and get started with Kubernetes:
- Ensure Virtualization Technology (VT) is enabled in BIOS
- Install VirtualBox and VBoxManage
- Install KubeCtl
- Install Minikube
- Launch Kubernetes cluster
Ensure Virtualization Technology is Enabled in BIOS Setup
First and foremost, ensure that Virtualization Technology (VT) is enabled in BIOS setup. In order to do that, do following:
- Shutdown the system and restart.
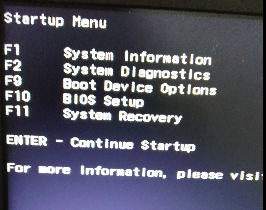
- Keep tapping ESC key when starting the machine. This would bring up the startup screen such as that shown in below screenshot:

Figure 1. Accessing BIOS Setup
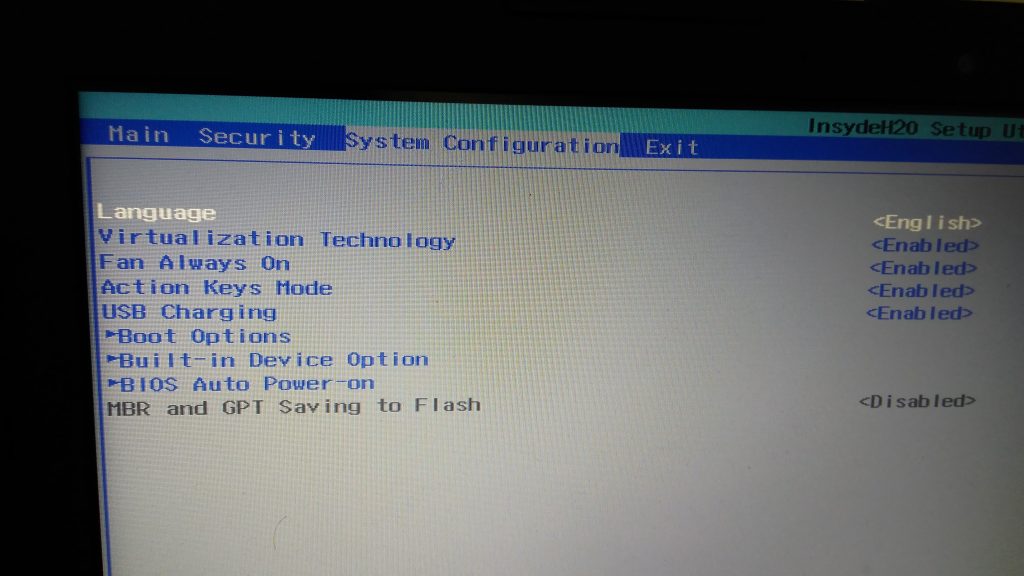
- Select F10 to go to BIOS setup. This would bring up the screen such as that shown below:

Figure 2. Enable Virtualization Technology
- Go to System Configuration, scroll down using arrow mark to Virtualization Technology, press enter, and select Enabled.
- Press F10 for saving and existing the setup.
Install VirtualBox (Hypervisor) and VBoxManage
Follow the steps given below to setup Virtual Box:
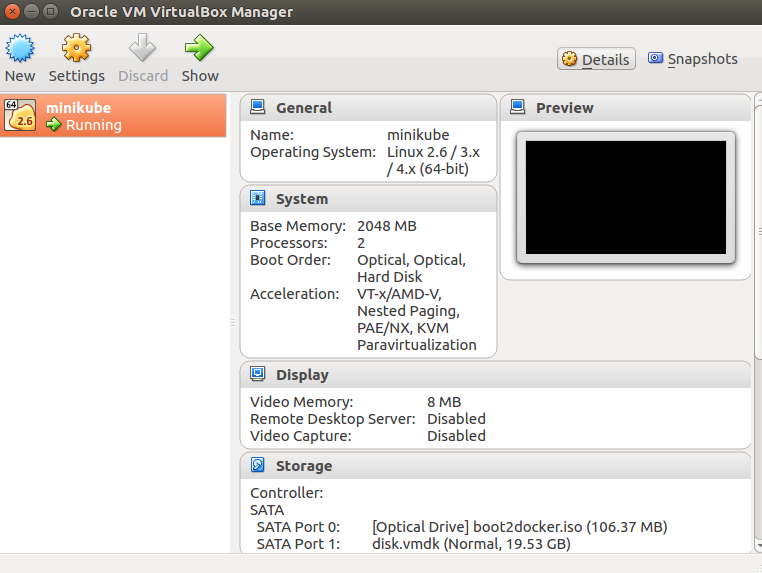
- Follow the steps mentioned on the page, How to Install Latest VirtualBox 5.1 on Ubuntu 16.06/Debian 8Execute command such as the following to ensure VirtualBox is setup correctly. It should open up VirtualBox tool as shown in the screenshot below:

Figure 3. VirtualBox Started
Follow the steps given below to setup VBoxManage:
VBoxManage is the command-line interface to VirtualBox.
- Download the appropriate VBoxManage extension on your system using the command such as following:
wget http://download.virtualbox.org/virtualbox/5.1.0/Oracle_VM_VirtualBox_Extension_Pack-5.1.0.vbox-extpack
- Install VBoxManage on your system using the following:
sudo VBoxManage extpack install ./Oracle_VM_VirtualBox_Extension_Pack-5.1.0.vbox-extpack
- Run the following command to confirm that VBoxManage has been successfully installed.
VBoxManage list extpacks
Following is the screenshot representing the output of execution of above command:

Figure 4. VBoxManage List Extpacks
Install Kubectl
- Execute the following command to download the latest version of kubectl
curl -LO https://storage.googleapis.com/kubernetes-release/release/$(curl -s https://storage.googleapis.com/kubernetes-release/release/stable.txt)/bin/linux/amd64/kubectl
- Change the permission of kubectl file to make it executable
chmod +x ./kubectl
- Move the kubectl to PATH
sudo mv ./kubectl /usr/local/bin/kubectl
The above details can also be found on the page, Install Kubectl binary via curl
In order to confirm if everything is alright, execute the following command:
kubectl version
Above would show the result as shown in the screenshot given below:

Figure 5. kubectl version
Install Minikube
Install Minikube using the following command:
curl -Lo minikube https://storage.googleapis.com/minikube/releases/v0.22.2/minikube-linux-amd64 && chmod +x minikube && sudo mv minikube /usr/local/bin/
Execute the following command which would print the version of Minikube such as v0.22.2
minikube version
Launch Kubernetes Cluster
Execute the following command to launch Kubernetes cluster
minikube start
Above would result in starting of Kubernetes cluster. Following screenshot represents the same:

Figure 6. Starting Kubernetes Cluster
Once started, access the Kubernetes Dashboard by executing following command:
minikube dashboard
It would open up a browser window with Dashboard as represented in the following screenshot.
You can stop the cluster using the following command:
minikube stop
- The Watermelon Effect: When Green Metrics Lie - January 25, 2026
- Coefficient of Variation in Regression Modelling: Example - November 9, 2025
- Chunking Strategies for RAG with Examples - November 2, 2025

I found it very helpful. However the differences are not too understandable for me