This article represents tips on how to get started with Ethereum Hello World program with Visual Studio. Please feel free to comment/suggest if I missed to mention one or more important points. Also, sorry for the typos.
Following are the key steps:
- Download Visual Studio community version from Visual Studio Download page. This is a very small file. However, once you click on this file, it starts downloading and installing the Visual Studio IDE which is 8 GB large file. So, have patience. Once completed, it will be installed.
- Start the Visual studio. For the first time, it takes considerable file to start. So, have patience.
- Download the extension from this page which enable Solidity smart contract development in the Visual Studio IDE. Double-click on the visx file and install the extension.
- Create a new project using Visual Studio. Select a “Solidity” project from options of different project types. Look at the following picture:
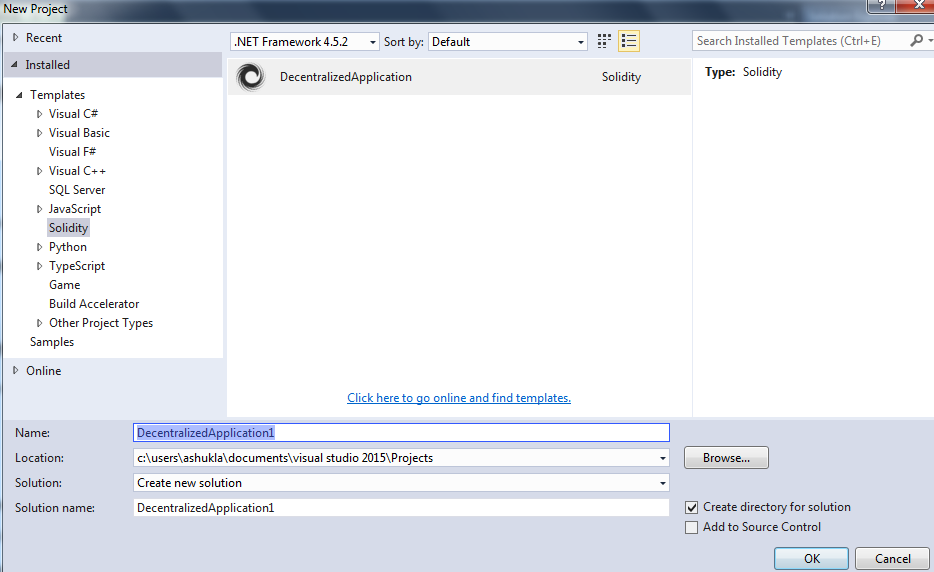
Visual studio IDE – Create New Ethereum project
- Once the new project gets created, it displays a help page for next steps such as following:
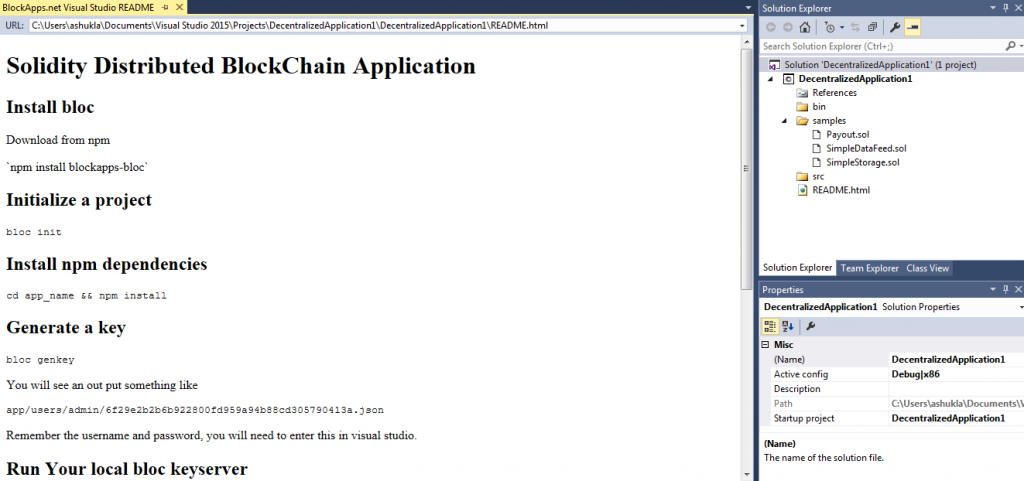
Visual Studio IDE – Ethereum App Help Page
- Download and install nodejs from NodeJS page.
- Once done with installation of NodeJS, do the following step:
- Execute the following command: node install -g blockapps-bloc. The instruction to work with bloc can also be found on this NPM blockapps-bloc page. The command is slightly different from the help page in the way that help page depicts “node install blockapps-bloc”. This leads to issue when you execute next command “bloc init”. It says “bloc” command not found. This is why you need to execute command given above in bold. “bloc” is a small command line tool that helps you build blockchain applications on the Ethereum network with the blockapps api.
- Execute rest of the command in the help page displayed above or displayed in the IDE as you create the new project. The commands are listed below:
- Initialize Ethereum Project: Execute command “bloc init”. This would ask a set of questions including app name.
- Install NPM Dependencies: Execute command “cd app_name && npm install -g”
- Generate a Key: Execute command “bloc genkey”. You would need to remember password you enter here.
- Run Local Bloc keyserver: Execute command “bloc start”.
- Configure distributed app in Visual Studio: Navigate to the Solution Explorer and right click on your project. Select properties. Enter the password you used with the `bloc genkey` command in the BlockchainPassword field.
- Deploy First Smart Contract: In Visual Studio in `samples` right click one of the `.sol` files and click `compile smart contract`. Next right click and click `deploy smart contract`.
- A browser will open with generated html page such as following based on the methods in the solidity contract.
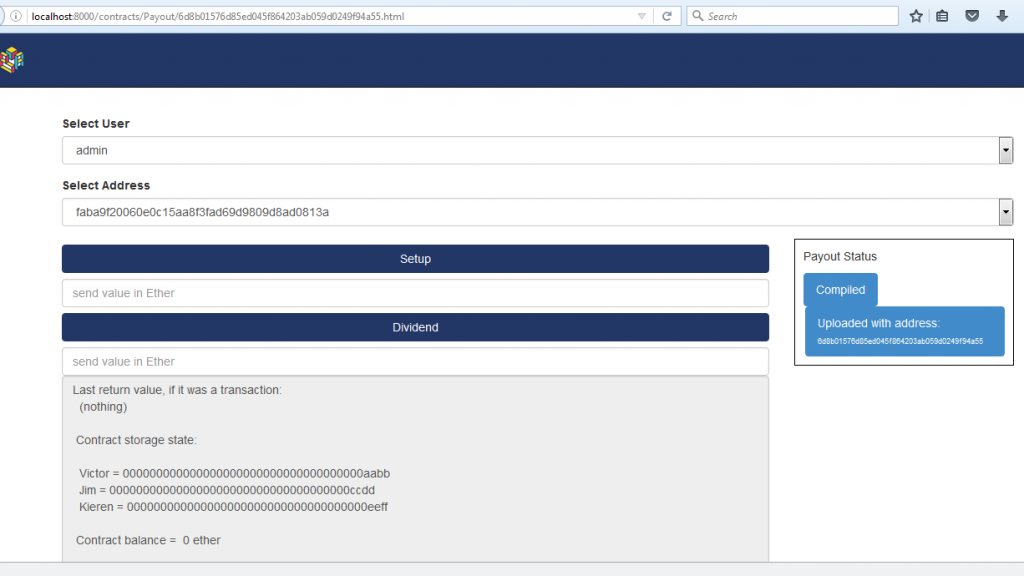
Visual Studio Smart Contract Hello App
- Once you follow above steps, you shall have your first smart contract deployed on the Ethereum dapp (distributed app).
Latest posts by Ajitesh Kumar (see all)
- The Watermelon Effect: When Green Metrics Lie - January 25, 2026
- Coefficient of Variation in Regression Modelling: Example - November 9, 2025
- Chunking Strategies for RAG with Examples - November 2, 2025
hi,
thank you for the post. I tried to follow all the steps that you have mentioned. But, when I deploy the payout.sol I am getting this error. Can you please help me to resolve this issue:
$ bloc start
bloc is listening on http://0.0.0.0:8000
api is pointed to http://strato-dev4.blockapps.net with profile ethereum
GET /users/ 200 76.487 ms – 12
GET /users/testuser 200 65.789 ms – 44
contract as body is: undefined
constructor arguments: undefined
data is: a779528d50b4c12cb5f7e9b8192ba43e390ab33c
About to upload contract
compile failed with error message: TypeError: Cannot convert undefined or null to object
caught a single contract
POST /users/testuser/a779528d50b4c12cb5f7e9b8192ba43e390ab33c/contract 200 706.226 ms – 24
extension was matched: html